


Tips for taking amazing photos with your smartphone


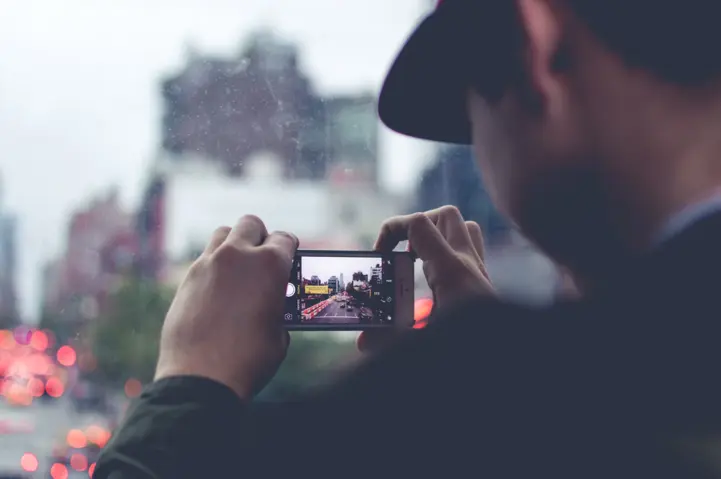
In the past, photography required the use of professional cameras and expensive equipment to take stunning photos. But nowadays, everyone can take amazing photos with their smartphones. The advanced imaging technologies available in these devices and the amazing filters enabled by the various applications give anyone the opportunity to capture beautiful moments in an innovative and exciting way. In this article, we will give you some important tips to take amazing photos with your smartphone.
Show key points
- With modern smartphones equipped with advanced imaging technologies and creative apps, anyone can now take stunning photos without the need for professional equipment.
- Proper lighting is essential for enhancing the visual appeal of photos, and experimenting with natural light sources can dramatically transform ordinary shots.
- Utilizing focus and exposure techniques allows you to highlight details and create beautiful blurry backgrounds that add depth and elegance to your images.
- ADVERTISEMENT
- Aligning the background with your subject helps maintain viewer focus and eliminates visual distractions, contributing to more aesthetically pleasing photos.
- Trying out innovative shooting angles adds a dynamic and artistic touch to your images, offering fresh perspectives and making them stand out.
- Using photo editing apps creatively enables you to enhance colors, add artistic filters, and correct imperfections, turning ordinary shots into eye-catching pieces.
- Continuous practice, experimentation, and embracing creativity are key to developing your photography skills and capturing memorable moments with your smartphone.
1. Take advantage of the right lighting: How to make lighting play a key role in your photos

Lighting, that enchanting power that can turn an ordinary image into an amazing canvas. They are the secret key to successful photography and stunning photos. Have you ever felt frustrated when the beauty of the scene is not properly reflected in your photos? Perhaps the reason is that you are not taking advantage of the proper lighting. Let's take a look at how to make lighting play a key role in your photos and enhance their beauty with a distinctive touch.
Recommend
Whenever it's time to take a picture, look at the scene and look at the light around it. Is there direct sunlight penetrating the window, or is the lighting soft and soft in the right shade? Taking advantage of the right lighting requires paying attention to detail and choosing the right time to take pictures.
When you take your phone to take a picture outside, the golden brilliance of the sun can be a double-edged sword. Direct solar rays can create harsh shadows and make the image dull. Try to avoid direct strong lighting and look for dark areas or soft natural light sources such as shadow and cloud. You may experiment with shooting at times of day that allow the sun to be less powerful, such as golden hours after sunrise or before sunset.
If you're indoors and want to take an unusual photo, look around to find interesting light sources. Is there a dim lamp or window through which a beam of light enters? You may find it possible to magically touch your image using these available sources. Experiment and mess with angles and experiments and don't be afraid to experiment with lighting and different effects.
Use lighting to create depth and dimension in your photos. When the lighting is strong on one side, shadows will be created that contrast between the lighted and dark areas. You may use this contrast to give your image a sense of depth and accentuate fine details. Make sure to place key items in the lighting area to highlight and give them life.
Finally, remember that lighting is not a hard rule, but an art that can be tried and explored. Taking advantage of the right lighting requires experimentation and continuous learning, so don't be afraid to explore the power of lighting and how it can turn your ordinary photos into magical moments. Expand for creativity and let lighting play a key role in your stunning photo story.
2. Use focus and exposure techniques: how to create photos with gorgeous blurry backgrounds and stunning details

While shooting with your smartphone, you can enhance image quality and bring out stunning detail by using focus and exposure techniques. Did you know that you can create photos with gorgeous blurry backgrounds that enhance the beauty of the scene and make it look like a painting? Let's figure out how to achieve this.
When you're focused on your subject, touch your phone screen in the area you want the focus to be. You will notice how that part of the image is in focus and the details in it become clear and sharp. You can also adjust the overall brightness of the image by manipulating the exposure technique. Find the Exposure icon in the Camera app and move it to adjust the brightness of the image to your liking. By manipulating the exposure, you can light up or shade the image for distinct effects.
Now, let's talk about the gorgeous blurry backgrounds. To achieve this effect, select the shooting subject and keep the distance between you and the back of the image away. When you focus on the foreground subject and keep it sharp, you'll notice how the background fades, blurs, and forms a beautiful picture frame. For stunning details in the image, slowly zoom the phone closer to the target until you notice its details clearly. You will discover how amazing the beauty of the small world is that you can see even with a simple smartphone.
Thus, you can now use focus and exposure techniques to create images with gorgeous blurry backgrounds and stunning detail. Explore your smartphone's capabilities, be creative in photography, and be sure to share your beautiful photos with the world.
3. Make the background align with the topic: How to choose the right background to enhance beauty and focus on the subject

When it comes to shooting stunning photos with your smartphone, choosing the right background can be a crucial factor. If you want to enhance the beauty of the image and focus on the main subject, making the background align with the subject is the first step to achieving this.
To start, you need to choose a background that is suitable and not distracting. Find a perfect location that provides a blank background and is suitable for the subject you want to capture. You may need to experiment with several angles to find the perfect background, but the result will be a worthy effort.
Also, don't forget to be aware of the elements in the background. You may have a main theme but the background contains strangers or unwanted objects. In this case, you can change the shooting location or adjust the shooting angles to retain the main subject and avoid any unwanted elements in the background.
Moreover, don't forget to be creative in choosing the background. You may need to look for unconventional and interesting sites to achieve the desired effect. For example, if you have a nature theme, you might choose a scenic background such as mountains or lush forests. This will not only enhance the beauty of the image, but will also reflect more adventurous spirit and excitement.
Finally, adjusting the depth in the image can also help make the subject stand out more and attract attention. By placing the background in a blurry or slightly blurred state, you can achieve superior focus on the subject and avoid any visual distractions.
If you want to take stunning photos with your smartphone, the right background is an essential component. Make the background align with the theme and choose it carefully to enhance the beauty and focus on the main topic. Explore unusual places and get creative with background selection. Also, don't forget to adjust the depth in the image to achieve additional artistic effects. Make the background enhance the image and add an exciting story to it.
4. Use innovative shooting angles: How to experiment with different angles for unique and attractive images

In the world of photography, innovative angles play a crucial role in giving the image a unique touch of creativity and arousing the interest of viewers. The use of innovative shooting angles can make a significant impact on shooting results and make images stand out in a striking and distinctive way. Experimenting with different angles gives the image a cheerful artistic nature and reveals new and uncharacteristic aspects of the scene depicted.
When you use creative shooting angles, you can change the subject's normal look and highlight different details in the frame. You can experiment with shooting from behind the subject to create a dynamic and engaging effect. Shooting from above or from below may give a unique effect and rejuvenate consideration of the subject. Plus, you can experiment with an oblique angle to give the image a sense of movement and dynamism.
Use innovative shooting angles to change the game and create a distinctive and original image. It may take some experimentation and innovation, but it will be a valuable effort when you see the results of your shooting. Enjoy exploring and drag your smartphone in funky and uncharacteristic corners. Remember that there is no strict rule in photography, so be bold and take the opportunity to show your creativity and uniqueness by playing with innovative shooting angles.
Eventually, when you push the boundaries of routine and tradition and use innovative shooting angles, you'll discover a new world of beauty and creativity. Make full use of your smartphone and explore different shooting angles to capture unique and engaging photos. Not all images may be perfect, but in each attempt you will learn something new and progress on your journey towards professional photography.
5. Explore editing apps: How to use available apps to enhance and edit your photos in creative ways
The power of creativity hides in the palm of your hands, just explore the available photo editing apps and you will discover an amazing world of magical transformations and artistic effects that can be applied to your selfies. Would you like to give your photo a touch of artistic elegance? Want to add vivid colors and fuzzy effects to your usual shots? Here are some creative ways to take advantage of editing apps to turn your ordinary photos into unique paintings.
Let's start with the basic editing apps that come with your smartphone, they're designed to enhance photos by adjusting brightness, contrast, and saturation. You can use them to achieve better color balance and enhance fine details in the image. You can also experiment with the different effects available in these basic apps to give your photo a unique artistic touch.
However, if you're looking for more creativity and engaging conversions, feel free to explore the creative editing apps available in your device's app store. These apps offer a wide range of tools, filters, and effects that can be used to give a unique personal touch to your photos.
Use art filters to turn your photo into a stunning canvas, where you can apply distinctive effects like oil painting or unique painting techniques. You may find influences that mimic popular art styles such as impressionism, hydrangea, or pop art. Choose filters that suit your personal taste and artistic expression, and you will find yourself retaining a unique memory that will delight you when looking at your photo.
You can also use editing tools to improve focus and exposure in the image and edit it creatively. You may find functions to fill edges, white balance, modify shadows, and highlight. Remember that the goal here is to highlight amazing aspects of the image and add effects that make it stand out uniquely.
Exploration and experimentation are the key to successfully using editing apps in creative ways. Don't be afraid to test new tools and different applications. Look for specialized apps that enable you to give a unique artistic touch to your photos, such as drawing apps or special artistic effects. Explore the options available and use creativity to turn your photos into a masterpiece worth sharing with the world.
Thanks to modern technology and the proliferation of smartphones, photography is available to everyone. But to take stunning photos, you should practice some simple tips and techniques that enhance the quality of the photos and make them stand out. Taking advantage of the right lighting, using focus and exposure techniques, choosing the right background, experimenting with innovative angles, and exploring editing applications are some of the important tips for using your smartphone creatively and getting stunning eye-catching photos. Finally, do not be afraid to experiment and innovate, only through continuous learning and application can you become skilled in photography and capture great moments worth sharing with the world.
